Friday, 5 October 2012

Best Birthday Cake

I have set myself a challenge this week to post something every day. (I missed Wednesday.)   Recently I celebrated another decade (ugh) with a big party (hooray).  At my request, A friend who is a professional cake maker, made this absolutely devine red velvet cake.  I have not made it myself yet, but will definitely do it sometime in the future. It was moist, light, very chocolately and had the most delicious cream cheese icing.  I asked her not to use sugar paste, so she placed fresh roses on the top. Very feminine and beautiful and gobbled down by all the guests.


Jo’s Red Velvet Cake
Yummy… Can’t stop eating it.

Ingredients
225g unsalted butter at room temperature
350 g plain flour
3 Tablespoons boiling water
1 teaspoon red paste food colour (recommended ‘Red Extra’ by Sugarflair)
40g cocoa powder (Dutch process of Green & Black)
250 ml buttermilk
1 teaspon bicarbonate of soda
¼ teaspoon salt (you can omit this if you like)
350 g castor sugar
3 eggs lightly beaten
1 teaspoon vanilla extract
1 Tablespoon white vinegar
250 g unsalted butter
500 g icing sugar
400 g cream cheese (or mascarpone)
1 teaspoon vanilla extract

Preparation method
Preheat oven to 170 C.
Grease and line 2 x 8” cake tins.
Mix together buttermilk and red food colouring
Sift the flour, bicarb, salt and cocoa powder
Beat the butter and sugar for 5 minutes until light and fluffy
Beat in the eggs a little at a time.
Mix well.
Turn your mixer to low and add 1/3 of the buttermilk mixture and1/3 of the flour mixture.
Repeat until everything is added.
Stir in the vinegar.
Divide between your tins and bake at 170 C for 40 minutes. (Adjust according to your oven.)
Cool, then ice.


For the icing
Beat the butter until smooth
Slowly beat in the icing sugar, then the
cream cheese until combined.
Do not over beat, as it will become too thin.


Here is a slice for you.  Enjoy.


The Dessert Table. 


Thursday, 4 October 2012

My Recipe for Boeuf Bourginon


A great dish for a family supper or for a dinner party

This classic is one of our family favourites.  My version is simple to make and utterly delicious.  Here it is served with tagliatelle, spring greens and roasted carrots and onions.

I am one of those cooks who add a splash of this and a dash of that, but I have tried to be more exact in this recipe.  However, it works well if you add a little bit more or less of any of the ingredients. Just make sure you use enough wine and that the liquid covers the meat in the pan.

This is just the best meal on a cold day.  It is one that I am happy to serve to guests as it can be made in advance so there is no fuss when they arrive.  I can just enjoy their company.

Ingredients

2 Tablespoons olive oil
1 kg of stewing or braising steak (2 1/2 - 3 lbs) cut into 1" cubes
1 package of lardons or 3 strips of bacon chopped into pieces
2 or 3 medium onions, chopped
1 clove garlic, crushed or chopped finely
2 Tablespoons flour
One Tablespoon salt and some freshly ground pepper
a few sprigs of fresh thyme
1 teaspoon oregano
red wine
stock cube (optional, but I like OXO)
water

Method
  • Heat a frying pan and add a little of the olive oil.
  • Fry the bacon until browned and put it in a large casserole dish.  I have a lovely, big Le Creuset which is perfect for this dish.
  • Brown the beef in the frying pan, about 6 - 8 pieces at a time. Add more oil if necessary.  Put  the browned meat in the casserole dish with the bacon.
  • Keep doing this until all the beef is brown.
  • Soften the onions in the same frying pan and cook until golden brown (5 - 10 min).
  • Add the garlic and cook for two minutes.
  • Add 2 Tablespoons flour, salt and pepper and stir to make a paste.
  • Add some of the wine to deglaze the pan, bring to the boil and pour this mixture over the meat in the casserole.
  • Add the rest of the wine (I used 3/4 of a bottle), enough water to completely cover the meat and the stock cube (crumbled).
  • Throw in the springs of thyme and the oregano.
  • On the top of the cooker, bring the whole mixture up to simmering.  (Do not allow to boil or the meat will be tough.)
  • Now cover the beef mixture with a circle of greaseproof paper or foil, put the lid on the pan and put it in the oven at 150 C.
  • Cook for 2 1/2 hours without removing the lid or peeking at it.  (This is the hard part.)
  • When it is cooked, remove from the oven and adjust the seasoning if necessary.
  • Serve with pasta, jacket potatoes, new potatoes or mashed potatoes.


N.B.  I made mine in advance and cooked it for 1 1/2 hours, then cooled and froze it.
When I wanted to use it, I defrosted it, added a little more water, then brought it to simmering point on top of the cooker and put it in the oven (covered as before) for another 1 1/2 hours. It was beautifully tender and moist.


Wednesday, 3 October 2012

Felted Bags


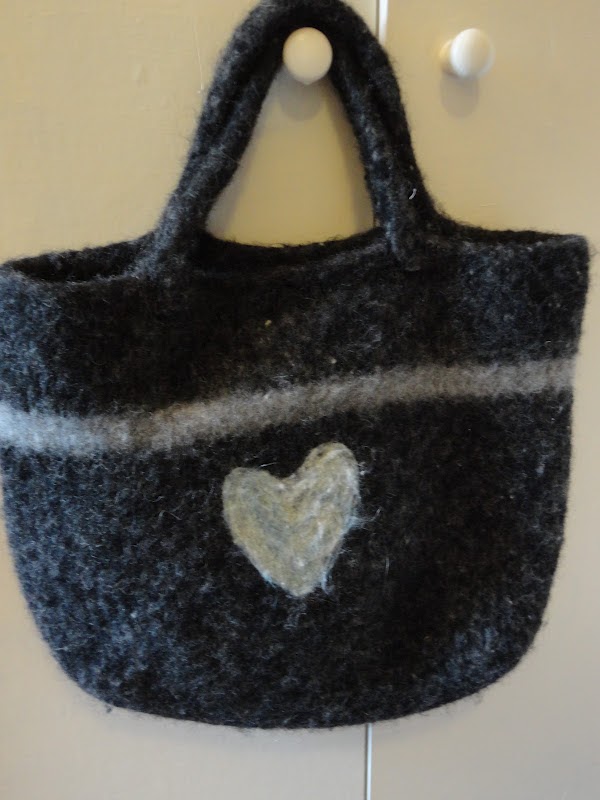
Felted bags are easy to make, particularly by a beginner knitter as they are made from yarn with a high wool content using large knitting needles.  It's a good project for a beginner knitter because it goes together quickly. When the yarn is thin, two strands are knitted together. Once the bags are finished and sewn together, they are put in a washing machine and washed to achieve the felting. The wonderful thing about felted bags is that they are not not only beautiful but economical to make.  They are also strong and secure.  I use mine for keeping projects in, but they could easily be used as handbags. In fact, if I don't find a new light weight winter bag soon, that's what the charcoal grey bag will become. These were made by a friend who buys old sweaters and cardigans in charity/thrift shops, unravels them and re cycles them into bags.  You can find lots of patterns and tutorials on line if you google 'felted bags'. 


This bag was made from a heather coloured wool and trimmed with a little bit of fluffy wool very popular for making scarves.


Here is a close up of the trim.  The colours are very effective.


My friend also included a strap for fastening and a button (now misplaced!)  I decided I didn't really need the strap, but I would use it for security if this were a handbag.


I love charcoal grey and this is my favourite.   You can see that she added a strip of a lighter colour for effect.


This little heart is made by needle felting.  You can probably find out more about the technique on line.


I think the heart and the stripe complement each other very well.

I have not yet returned to the knitting group this fall, but I may try a felted bag as one of my projects this winter as I am a slow and not very accomplished knitter.  (Sewing is my thing.) It would be good to have a project that moved quickly and had a good end result.

Monday, 1 October 2012

How to Change a Neckline

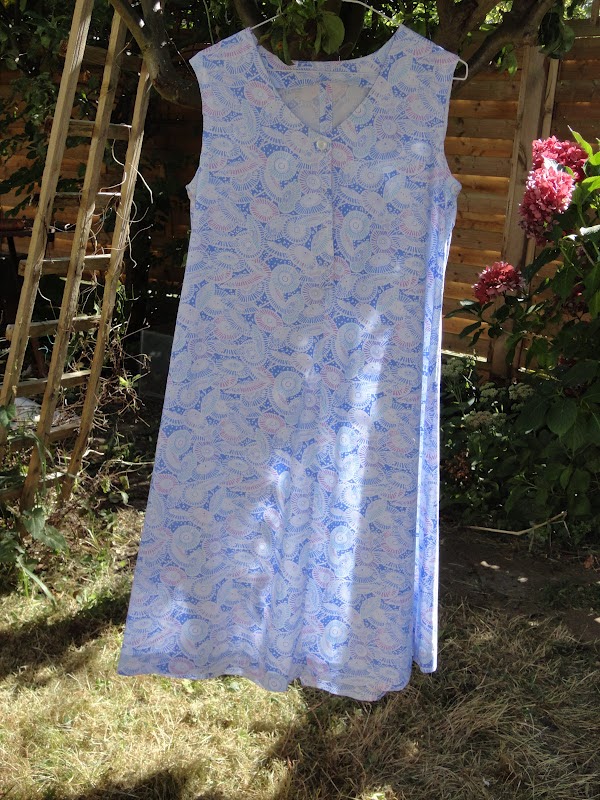
In my yesterday's blog, I showed two dresses made from one pattern.  The first was a blue Liberty print made almost exactly as the one on the left.  The second was a raspberry linen, made with a round neckline and patch pockets.

Changing the neckline is easy.  


  • Trace around a favourite neckline (I used a t-shirt), or draw your own freehand.
  • Cut out your new neckline pattern on paper.
  • Place the new neckline pattern over the original pattern, matching up the shoulder seams.
  • Make the neckline facing using the new pattern for the shoulders and neckline and adding 2 1/2 inches (6 cm).
  • Cut out the facing and line with iron on interfacing.
  • Make sure you can get the dress over your head.  In this case, I left an opening at the centre back.


The new neckline and shoulder seam.


Measuring the facing.


Marking the facing.


Cutting the facing.


The finished front neckline


Inside view of facing

The inside back 


The inside back, showing armhole facing made from bias binding.


Back neckline with crocheted loop and button


Close up of pockets


Finished dress


Sunday, 30 September 2012

Two Dresses, One Pattern


I made these dresses in the early summer, but did not photograph them until early autumn.  Here they are hanging from the pear tree in our small London garden.  In the background you can see the hydrangeas which almost match the dress on the right.
Having made the blue Liberty print dress, I decided to use a piece of raspberry linen to make another one.  I changed the neckline and added patch pockets.
Both dresses were a success except that they are a bit too triangular for me. I have decided to nip in the waistline on the blue one by making an obi to cinch it  and to alter the raspberry one by taking in the centre front and side seams to give it a bit more shape.  They should be ready by next summer.
It seems, I never really get the look right until the second wearing. Does anyone else have this problem?
Apart from that, they are perfect summer dresses. (Note the irony.)


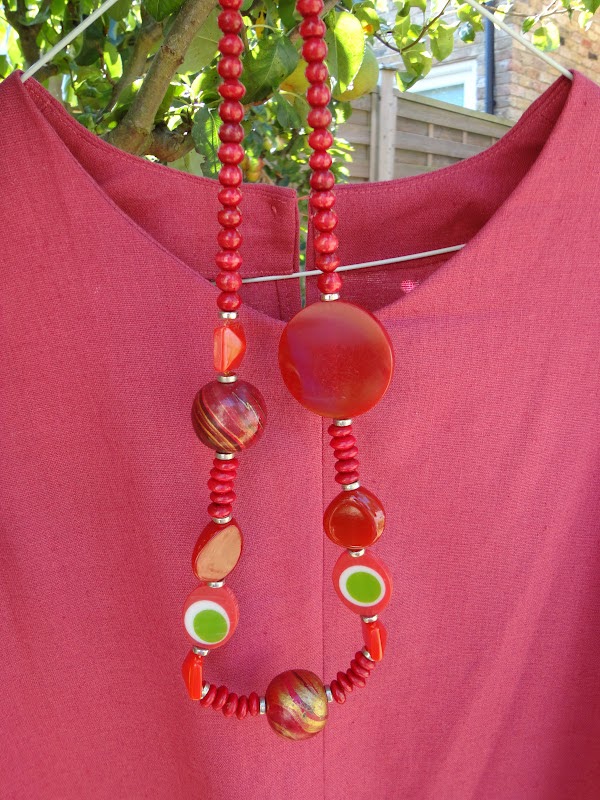
Before Hubby got to France, a friend and I had a two day break in Jersey, staying in a smart hotel with a posh dining room.  I had not taken dress clothes with me to France, so I had to make do with the raspberry dress.  I smartened it up by wearing red shoes and a necklace from a collection that my friend sells on her site: http:zippy-zebra.surinternet.com.


The original dress

A close up of the neckline

Restyled dress
New neckline and necklace by Zippy Zebra


Sunday, 23 September 2012

Back to Blogging - Harvest

Some of the jars of fruit.  From left, red plums, nectarines and peaches.

Fruits of My Labour

I spent the summer in France, where I did not knit, crochet, sew, garden or blog.  The first three because I just was not in the mood to do these creative things, probably because I was tired after all the exertions of the winter and spring. And even though I took several projects with me, I could not be enticed to get them out of their bags. The last because it was slightly difficult to do.  In order to blog, I had to take my laptop to a nearby town in the afternoon, when the IT shop was open.  I am a morning person and by late afternoon, I am thinking of having a nice drink, a few nibbles and then an evening meal. I do not want to be in the car on my way to doing a purposeful activity.  To be honest, there are so many lovely things to do in France, like visit beautiful towns and eat lovely meals that doing something purposeful just doesn't appeal.
A box of red plums from the market.

However, I did do lots of canning. I canned 14 jars of fruit.  These will keep us going on dreary winter days when we need a taste of cheery summer fruit. I canned peaches, nectarines and red plums.  I even made the canning easier by a taking a few short cuts.  We will see whether these were successful when we open the jars.  For example, I did not stone the plums.  They were too small and too juicy.  I did not peel the peaches.  I have always done that in the past, but it is so time consuming that I decided to leave that step out this time.  I did, however, sterilise the jars and process them with the hot bath method.  And this year, I tried to get the fruit right up to the top so there were no air gaps at the top to turn the fruit dark. 


We picked apples in France - a few from our very young trees - and at home where they clearly liked the wet summer followed by dry weather.

I will freeze some, make sauce with some and use some in crumbles (mixed with other fruit) and cobblers.
They will make excellent sauce, cobblers and crumbles.
And finally, I primed the lavender in our garden.  It also had a prolific year and the bees loved it.  I have put it in pillow cases and will make lavender sachets out of pretty scraps of fabric soon.


Some lavender from my garden.