Sunday, 15 April 2012

Stitch Up - Just Another Excuse to Buy Fabric

Much to my delight, a new fabric shop opened three months ago in Wimbledon Park.  It's called Stitch-up and its proprietor is Sandie Bonfield, a former dressmaker, who saw an empty shop in Arthur Road (very close to the tube) and decided to go for it.

The shop is filled with beautiful fabrics, wools, trims, ribbons, etc.  It offers courses on knitting, crochet, quilting, making blinds, piped cushions and it even ran a course for teenagers to make skirts over the Easter break.  The last time I visited it, there was a course for 8 - 12 year olds making patchwork cushions.

It makes me happy to see youngsters engaging in sewing and knitting.  They are such good life skills and for me have provided lasting and enjoyable past times.

Every Monday there is a Knit and Natter group and one Wednesday a month there is a knitting group in the evening.  For full details, go to www.stitch-upinfo.co.uk or ring 020 8944 6488. You can be put on their mailing list and receive details of all new course and events.


It's important to support small businesses, so needless to say, I bought fabrics on both visits. One of them was the pink pinwheel cotton, third one down from the top.


These wonderfully quirky teapots by Jan Tucker are dotted around the shop.  I love them!


There are also lovely things to buy or to inspire you to make.


Just across the road is The Aviary Society , a charity and tea shop that provides aviaries in care homes.  Lovely idea.


And just down the road is The Cake Parlour which specialises in wedding cakes and has cupcakes to die for.


Finally, on Saturdays there is a Framers' Market in Wimbledon Park.  (Sorry, no photos). What a lovely place to visit.

Friday, 13 April 2012

Chinese Jacket


This jacket was a birthday present for a friend of mine. The lovely pink really flatters her complexion and I am happy to say she was delighted with it. She will look very glam on her days at home.

Once again the jacket is made from a Cotton Traders sweatshirt. They are such good quality but  I wish they would not put a prominent logo on the front.  I have managed to hide the logo on previous jackets. with ruffles and collars and pockets.  This time I have placed a button over the logo. It doesn't exactly hide it, but it disguises it.

I may do a little research on the internet to find another source, but I do want this quality.

What you need:

  • a sweatshirt
  • some toning fabric (I used this little floral print)
  • a piece of wadding or fleece to interline the collar
  • a pattern for a Chinese collar (or make one yourself)
  • some buttons to cover


How to do it:

Begin by cutting all the ribbing off the sweatshirt.


Carefully measure and cut a straight line up the centre front of the sweatshirt to make it into a jacket.


Make a pleat at the centre back of the neck about 2 1/2 inches long and 1 inch wide when folded.

With right sides together, pin and stitch the outside of the collar to the neckline.


Sandwich the collar lining between the outside of the collar and the fleece/wadding.
Stitch around the edge.
Trim the fleece so that it will fit neatly into the collar pieces.


Hand stitch the lining into place.


Stitch front facing to each side of the jacket.

Turn under the raw edge and machine stitch.

Face the hem the same way and tidy up the edges by folding ends under and tucking front facings into the hem facing.

Do the same at the collar edge.  If necessary, stitch by hand.

Now face the ends of the sleeves in the same way.  Machine stitch the facing to the sleeves.  Turn under and finish by hand.

Make four loops 4 1/2 inches long by 2 inches wide.
Fold in half lengthwise and then fold in each side to the middle.  Press and edge stitch.


To insert the loops, open up the stitching in the front facing on the right side at measured intervals and insert the loops.  Re-stitch by machine.

Cover the buttons following directions on the packet and sew them on the the left side.

Press the facings and collar gently.


Tuesday, 10 April 2012

Lemon Chiffon Celebration Cake


My mother made this chiffon cake for special occasions - birthdays, Easter, etc.  It is a delicious and rich cake which I now make for family celebrations too.  This year, as we are at home for Easter instead of in France,  I am celebrating having Easter with the family.

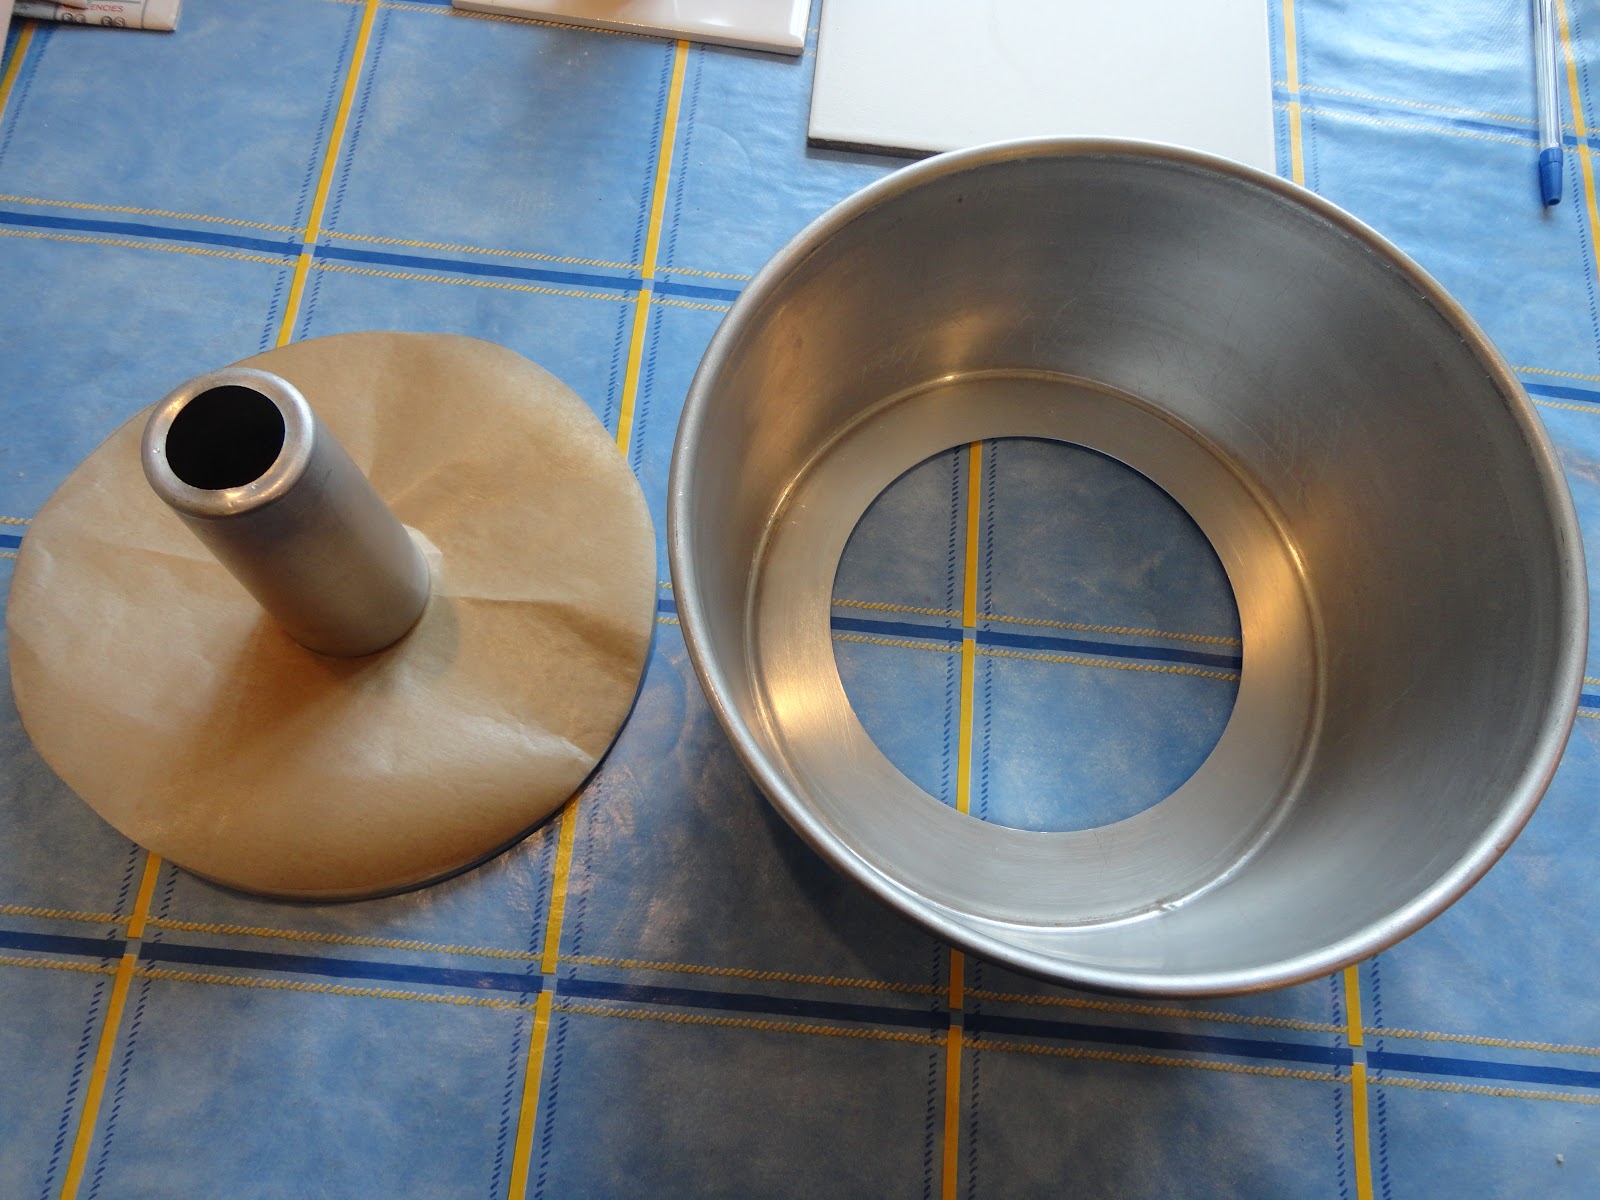
In order to make this cake, you need a tube pan.  This one has a loose bottom which makes it easier to remove the cake when it is done.


As this is a chiffon cake, which is a bit like a soufflĂ©, you must not grease or line the pan or the mixture will not be able to climb up the pan and rise.  I cheat a little, though and line the base with baking parchment.  It makes the cake easier to remove from the pan when it is cooked and cooled.


A chiffon cake is not difficult to make, but it requires a little care, as it called for 8 eggs.

Recipe for Lemon Chiffon Cake

2 cups sifted plain flour.  (Use a coffee mug if you do not have American measuring cups).
1 1/2 cups sugar
3 teaspoons baking powder
1 teaspoon salt
3/4 cup cold water
1/2 cup oil (sunflower or similar; you don't want to use one that has a definite taste or flavour)
2 teaspoons vanilla
2 teaspoons grated lemon zest
7 egg yolks
8 egg whites
1/2 teaspoon cream of tartar

  • Move oven rack to lowest position.
  • Prepare your tin.
  • Heat oven to 170 degrees Centigrade
  • In a large, clean mixing bowl, beat egg whites and cream of tartar until whites are stiff.
  • Set aside.
  • In another bowl, mix flour, sugar, baking powder, and salt.  Beat in cold water, oil, vanilla, lemon zest and egg yolks until smooth. 
  • Gradually pour this mixture over the egg whites and fold in gently so that you retain air in the mixture.
  • Pour mixture into cake tin.
  • Bake about 45 minutes.  This is all it takes in my oven, but check that it is done with a skewer.
  • Invert the tin over a long-necked bottle or a metal funnel (quite a long one!) until the cake is cool.
  • Remove the cake from the tin by running a knife around the edges and gently loosening it.


Mixing the cake batter


 Folding the batter into the egg whites


Letting the cake cool by hanging it upside down.

Filling and decorating the cake

When the cake is completely cook, mark the sides of the cake with toothpicks and slice through the cake so you have three layers.


Fill with lemon curd mixed with cream or creme fraiche or anything you like.  It could be thick chocolate custard or creme patisserie, for example.  I prefer lemon as it cuts the richness of the cake and icing.

Top the cake with icing made from icing sugar and water and decorate according to the occasion.  I used chocolate eggs.


Enjoy.

Monday, 9 April 2012

Too Beautiful to Dye?

We always coloured eggs when I was growing up and it is a family tradition that has continued. In the USA we had white eggs.  Brown eggs were considered somewhat inferior, just as white eggs are not in favour here in England.    But brown eggs do not dye as well.  Our butcher reserved these six duck eggs for us. They are such lovely pale tones of bluish white that I am reluctant to dye them.  However, I promised coloured eggs so I will deliver.


I was right. They were too beautiful to dye.  First of all, my Paas Easter Egg Colouring kit was too old and the dye tablets were crushed and running into one another, so they had to be thrown away.  Then, some of my food colours were too weak to dye the shells - fine for icing, but not for eggs - so the blue and green stayed pale and showed the beautiful striations of the shells, but the others are a bit garish.  


Nevertheless, they looked very festive on the table in my mother's old pressed-glass egg dish.


Along with the pretty Easter cookies we made and iced.  

Hope you had a Happy Easter.  We certainly did.

Saturday, 31 March 2012

Fortune Cookie Bag


These fortune cookie bags are wonderful.  So useful and pretty. I have made about a dozen of them and given them as presents to family and friends.  I saw something similar at the V & A awhile ago and thought it was such a good idea.  You can put just about everything in it.  It can be used as a shopping bag (to save using plastic ones), for carrying your gym kit or your swimming things, to carry baby things, or even to keep your knitting or crafts in.  I have used mine for most of the above (no babies). One of my friends wore hers to a wedding.  Another friend called it a "Tardis' bag as it holds so much.


This is what it looks like when it is flat.  


This is another one with the 'ears' tied to make a handle.
To use it, you simply tie the 'rabbit ears' together and sling it over your arm or over your shoulder.

How to Make It

You will need two squares of fabric 30" by 30" (76cm x 76cm).
With wrong sides together, cut a diagonal line from the top left hand corner to the bottom right hand corner.
Now cut a diagonal line from the top right hand corner to the centre of fabric.


Finally, cut a little square in the middle of the V (about 4" by 4").


With right sides together, stitch the smaller triangles to the larger triangles, leaving a little space at the top to insert the gussets.


Make a little gusset by folding the squares in half and inserting them in the V's of the bag as shown.  I have used white thread so it is easier to see.  However, when I make this bag, I will use matching thread.


The one below is finished.


Stitch all all around the sides and bottom of the bag, leaving the centre free.

Stitch down the inside of the bag handles ('ears') about 7".

Finish all raw edges by edge stitching or zig zagging.


Press, turn to right side and you are finished.

To use the bag, tie the handles together at the top.  You can wear it over your shoulder or over your arm.